
Hi,
This is my third and last post dedicated to HADR solutions in Azure SQL Database, where I’ll introduce “Auto-failover groups“.
You can find the previous ones here:
- HADR in Azure SQL Database (Part I) – “Scale out read-only Database”.
- HADR in Azure SQL Database (Part II) – “Active Geo-Replication”
So, first of all, what is Auto-failover groups?
“The auto-failover groups feature allows you to manage the replication and failover of databases to another Azure region. You can include of a group of databases or all user databases in a logical server to be replicated to another logical server. It is a declarative abstraction on top of the active geo-replication feature, designed to simplify deployment and management of geo-replicated databases at scale.“
Using Auto-failover groups it is possible to have a readable replica in any tier (even Basic) but bear in mind that the Azure region in which the readable secondary database resides must be different from the azure region where the primary is installed. If you read my post about Active Geo-Replication, you’ll see that when using it, both databases can reside either in the same or in a different region, whereas with Auto-failover groups they must always be in a different region. Also, Auto-failover groups only supports one secondary logical server. So, if you need to create multiple Azure SQL Database geo-secondary replicas (in the same or different regions) for the same primary replica, use active geo-replication.
Other than that, I would say that Auto-failover groups resembles a bit more like On-Prem AlwaysOn Availability Groups (AG) in the sense that:
- Several databases (from the logical server) can be added to the same failover group;
- In case of a failover, all the databases in the group will be included in the failover process;
- Automatic failover is supported;
- After a failover it is not necessary to change the connection strings (as long as they’ve been properly configured previously)
How to create and use Auto-failover groups:
I’ll use the Azure Portal for this demo. I already have two logical servers in different regions, one has the primary replicas and the other one will receive the readable secondaries. In my demo I will put three databases in one auto-failover group.
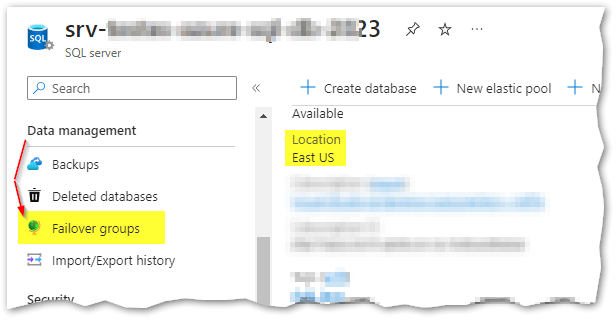
Ok, first let’s go to the primary server that holds the 3 databases and from the left panel, under “Data management” , click “Failover groups“:
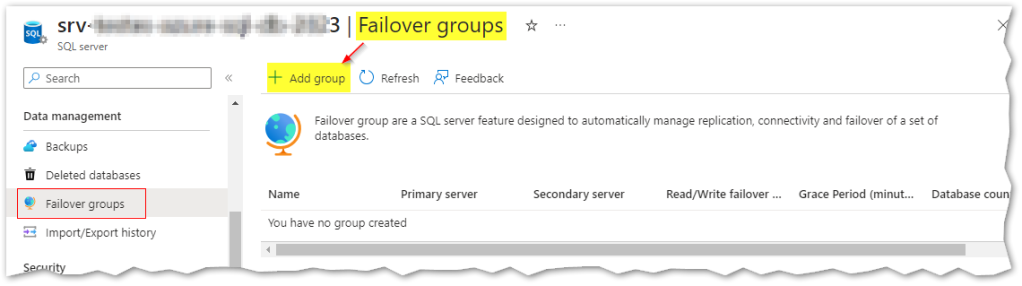
we can now create a new auto-failover group, by clicking “+ Add group“:
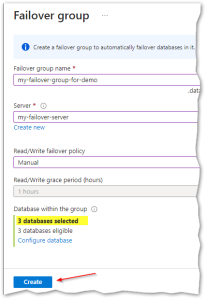
The failover group name has a global scope, hence it must be unique in all Azure platform:
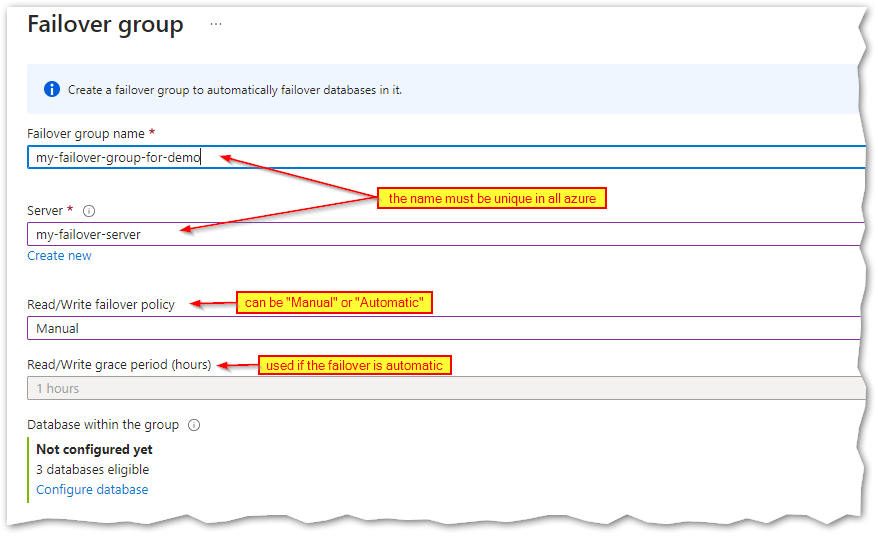
Besides the failover group name, we need to specify the server that will act as the failover partner (in my case it’s called “my-failover-server”), remember this server must reside in a different region from the primary.
As I mentioned earlier, it’s possible to have automatic failovers and that can be chosen from “Read/Write failover policy” as we can see in the picture above. Now if you choose an automatic failover policy, how soon will the failover take place in case of outage in the Primary? That depends on the value chosen in the “Read/Write grace period (hours)”, the system triggers a geo-failover after the failure is detected and the grace period has expired. Knowing that the minimum value allowed for the grace period is one hour (at the moment), that will also correspond to the minimum time to wait for the automatic failover to occur.
Attention: When using Auto-failover groups in Azure, the replication is always asynchronous between replicas, even when they’re configured with an automatic failover policy thus making the possibility of data loss unavoidable if the primary fails. If you’re used to work with OnPrem/IaaS AlwaysOn Availability Groups (AG), bear all this in mind because there is a (very) significant difference in automatic failover configurations and behaviour between Auto-failover groups and AGs.
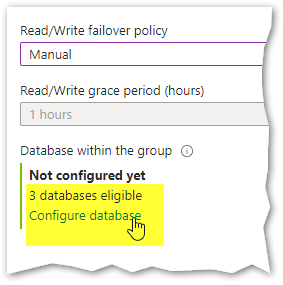
Ok, moving on with the creation of our failover group, we now need to specify which databases will be included in this group. That can easily be done by clicking on “Configure database”, below in the panel:
After selecting the desired databases, we have all we need to create the failover group, so I’ll simply press the “Create” button:
The 3 databases will now automatically be created in the partner server and populated with the data of the primary databases, this process is known as seeding. Once all the data is copied, the newly created databases will be ready to act as readable secondaries. Right after pressing the create button, we can follow this process using T-SQL:
SELECT db.name as primary_database,
grl.start_date, grl.modify_date, grl.partner_server, grl.partner_database,
grl.replication_state_desc, grl.role_desc, grl.secondary_allow_connections_desc, grl.percent_copied
FROM sys.geo_replication_links grl INNER JOIN sys.databases db ON grl.database_id = db.database_id

And after a while they’re ready:

Now, let’s have a look at the failover group panel from the Azure Portal. If you can’t remember how to get there, it’s mentioned above and it looks like this:
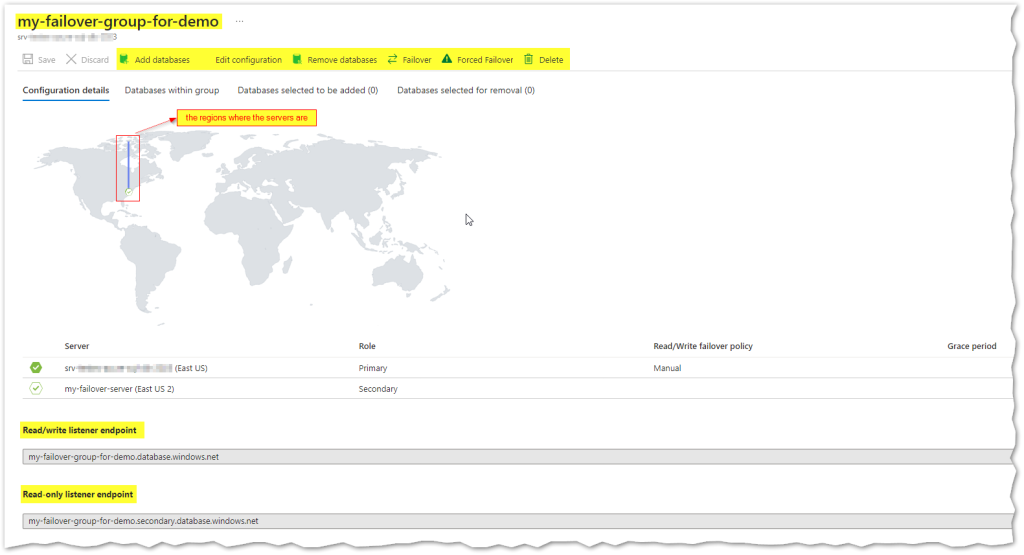
From the picture above, we can see that there are two listeners, one for the primary server and another for the secondary server. Also it’s from this panel that we can add/remove more databases to the group, change configurations and perform a failover.
The listener names always follow the same rules:
- Primary: <failover group name>.database.windows.net
- Secondary: <failover group name>.secondary.database.windows.net
So, if you use these names in the “Data Source” property for all the connection strings in your applications, they won’t need to be changed after a failover, since one of the listeners will always point to the primary and the other will always point to the secondary. Again, it’s worth to point out the difference between auto-failover groups in azure and AlwaysOn Availability Groups (AG) since the latest will have a single listener name (per availability group) and the connection to the primary or read-only replica is made based on another property in the connection string called “ApplicationIntent”. If “ApplicationIntent = ReadOnly” then the connection will be established to the secondary.
Using Auto-failover groups
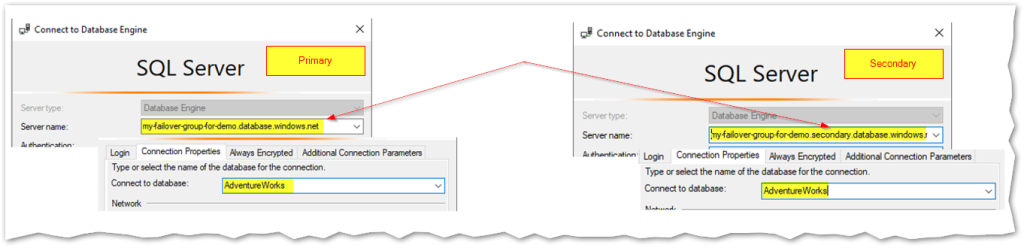
Now that it’s created, let’s try this out! I’ll start by connecting to one of its primary databases and instead of using the server name, I’ll try doing it with the primary listener name: “my-failover-group-for-demo.database.windows.net”. Next I’ll connect to a read-only database with its secondary listener name “my-failover-group-for-demo.secondary.database.windows.net”:
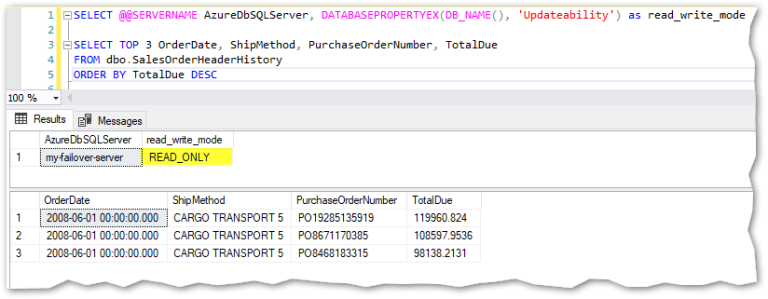
Let’s see the corresponding server names and database roles (using function DATABASEPROPERTYEX(DB_NAME(), ‘UpdateAbility’)):

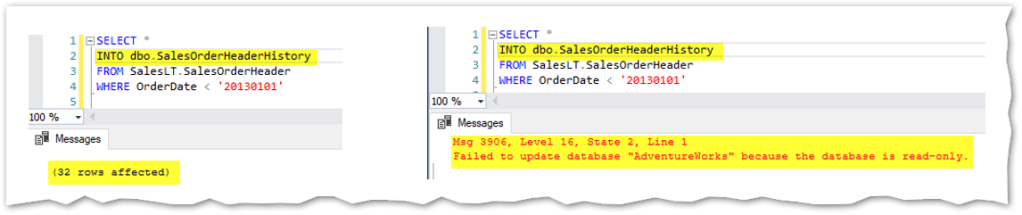
As mentioned in the image above, only the primary is read-write. Using the next query, I’ll create a new table to keep historic data regarding SalesOrderHeading and since it implies the creation of a new table plus inserting data into it, the statement will only work on the primary server, not in the read-only replica as shown below:
But all the changes made in the primary are automatically propagated to the secondary replica, asynchronously. For example, I can now read data regarding the newly created table in the read-only replica:
What I’ve shown for the AdventureWorks database regarding the connection and server roles, will happen in the same way for all databases inside this failover group. When I issue a failover, all databases inside this group will participate in it, just like what happens with AG.
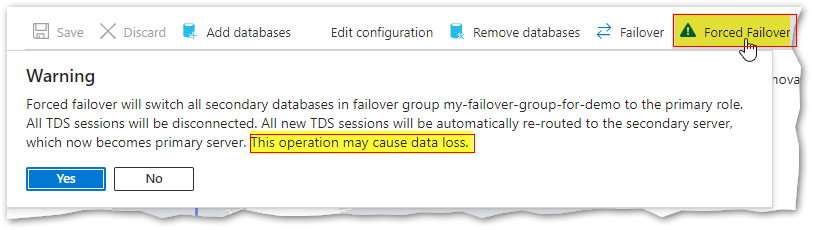
There are two ways for me to do the failover: Planned Failover (without data loss) and Forced Failover (with potential data loss). Forced Failover could be used for example in case of a disaster due to a severe failure on the primary server, whereas Planned Failover usually occurs for operational reasons (Architecture requirements, performance boosting, security guidelines, testing, etc.).
A planned failover performs full data synchronization between primary and secondary databases before the secondary switches to the primary role and this guarantees no data loss. The forced failover immediately switches the secondary to the primary role without waiting for recent changes to propagate from the primary. This operation may result in data loss.
Using the Azure Portal, there is a warning mentioning what will happen for each option:
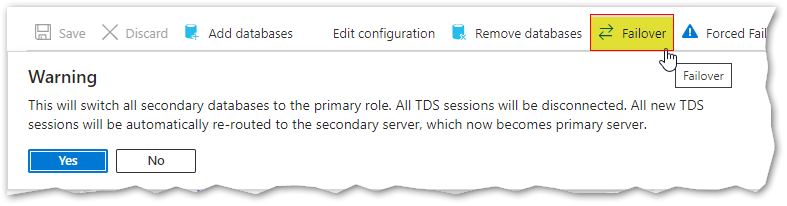
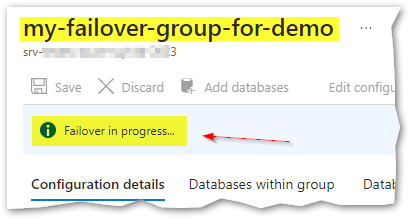
I’ll now perform the planned failover from the failover groups panel in Azure, by choosing “Failover” and pressing “Yes” (just like in the picture above). As soon as I click the button, the failover will initiate like shown here:
We can also follow the replication state using T-SQL, executing the query I wrote above.
Once the process is finished, I’ll now reconnect to make sure the roles switched. The good news are that thanks to the listeners, I don’t have to change the connection strings, each listener will direct the connection to the appropriate server automatically. So here we go:

As we can see below, the former primary is now secondary and vice-versa:

I’ll also connect to the other two databases (one at a time) to show that the new primary is the former secondary for all of them:

Yep, don’t forget to use the listener names (for both primary and secondary) in your connection strings instead of the server names, so that you can benefit from this feature and don’t have to worry about changing the connection strings after each failover. This feature is not present in Active geo-replication, at least by the time I’m writing this post, who knows in the future…
This has been the last of three posts regarding HADR solutions in Azure SQL Database, I hope you could find them useful.
Cheers! 🙂
